Hello all, a short personal reflection:
Over the last few weeks I have found myself getting swept away: my on going illness has reared its ugly head and I have been both scared and in denial (dashes off to ring the nurse as I promised BH I'd do it today...). On top of this, I have been told that my contract with work won't be renewed, so I have had to seriously think about my future.
While I have known for a while that the next step I want to take would be into teaching, our wonderful government stopped the Graduate Teaching Program route to the new Schools Direct. While I am sure it will be a better course, the information available about it has been slow coming and now I am in the process of trying to sort my application I have been hit by 'the fear'.
What do I do if I don't get on a course?
Is there another job I can see myself doing?
could we afford for me to go receive nothing but student loans for a year?
This has not been helped by the daunting task of having to write personal statements and navigating the long and sometimes complicated form (even BH didn't understand what information they are asking for at times).
At a time in life that I am excited about my future with the man of my dreams I also feel frozen by the fear of the unknown as my who working life is being pulled from under my feet.

Monday, 19 November 2012

Friday, 26 October 2012
Wedding Bands: What a Palaver
WARNING: Crazy bride lady!!!!!
 |
| Phone camera photo of my engagement ring As sent to my family, as I was on holiday in Scotland |
I thought I was doing ok with the wedding; I seemed to have gone the other way - I knew exactly what I wanted and was prepared to put in the work to get it, that was until it came to the rings...
When we were in Scotland a few months ago we popped into the Edinburgh branch of the Jewellers BH had purchased my engagement ring from; this visit was a change for my man to have a look and try on some rings to figure out if it was something he wanted, at the time I also had a look at rings and quite liked the way a 2mm band looked.
 |
| LimeBlue store Farnham |
Then 6 weeks ago we went to the store local to us and had a look again, this time the lady went through a few more options, but I stuck with 2mm, even though I was unable to try it on my ring finger as the sample was too small.
Last Saturday we went and collected the rings, and for the first time I was looking at MY ring! and it was small, so small it looked like a washer. On Sunday we gave the rings to my parents to keep safe. Sunday night I got myself into a tizz and decided it was definitely too small, rang my Mum Monday and had the ring posted back.
Today I went back to the shop, they were very understanding, let me go through the options again and sorted everything out so I could order a different width. I selected a 3mm band this time and left the shop.
About 30 minutes later I returned, still not 100% certain, did I actually want a 2.5mm (I know I am totally crazy). Out came the boxes once again, the lovely staff suggested different ways to look and compare the rings to get a really good idea. After some discussion and encouragement and reassurance I was happy with the decision I had made early, I stuck with my new order and for the first time new I was happy with my choice of ring, that I will (hopefulyl) be wearing for decades to come.
I cannot recommend LimeBlue enough, the staff have been so friendly and helpful on every occasion If they can put up with me, they will give anyone the best service available and their diamonds are stunning!
If you live locally to one of their stores (or are passing near by) definitely take a few moments to pop in and have a look.
Wednesday, 24 October 2012
Invites: Finished Product
Now all the invites have been sent (hopefully all have been received) and RSVPs are (very) slowly beginning to arrive; I thought it was time I shared them with you all.
I have already shared with you how we came to some of our decisions, Beautiful Detail looked at the fonts and colours I have used and On My Marks explained the use of a pocket-fold invite and belly-band, but now I bring to you the full details (and dilemmas).
I really like it when an invite comes as a complete package, when all the elements and info tie in together and it feels like a whole and we had a lot of information we wanted to pass on, as most people are coming from out of town. BH, on the other hand, prefers a simple (elegant) style invite.
Using a Pocket fold enabled us to combine both tastes as well as creating a handmade item.
I knew there are lots of possible setups for pocket folds, and to make life easier I ordered a sample pack from PDA Card and Craft, who had the widest range of designs that I could find; this allowed us to physically look at the options and mock up a couple of ideas. As part of the pack we also got swatches of the paper they stock and were able to know exactly what we were buying (BH got rather annoyed as it took me weeks to decide which pearlescent card I wanted to co-ordinate with the Laid card we'd chosen)
We opted for the A6 Pocket-fold in Brilliant White Laid (Contour) with matching A4 card to create the Direction and further info sheets and paper to make the sections for the RSVP, we also selected Crystal White for the RSVP folded card and A4 card to make the invite inserts, finally we chose to get matching Brilliant White Laid envelops to finish the set.
I also decided to create a 'belly-band' to hold the invite together, but also to add a decorative, crafty element to the design. The demo band was just hessian, BH felt this was too shabby for it to work with the more formal style; I then found the grey stitch grosgrain ribbon, and after a second demo, we both felt that the design was greatly improved by its inclusion.
As we had selected the smaller smaller size for the pocket, I chose to design two invite sections; one for the marriage ceremony in the church and the other for the reception. This meant that no element was too crowed, we could include the drinks at the church and info about photo before welcome drinks in Coventry on the relevant invite and that we didn't have to re-think the whole design for the handful of evening invite we sent.
Choosing the A6 pocket had its upsides (or John Lewis gift list cards fitted perfectly tucked, hidden. behind the info sheets) and one big downside - with all the info we wanted to include I wasn't able to use pre-cut inserts and had to faff with publisher and pdf files to create the desired size and spacing in-between each element.
As we are providing a vintage bus for people and many of our friends have dietary requirement we decided to include a self-contained and pre-addressed RSVP card to make keeping track of these details simple.
I originally ordered the circular RSVP seal stickers from Label Amour (their ebay store), who then kindly designed and printed the coordinating address labels.
Having invested in lovely envelopes I decided that I wanted the invites to look good from the minute they are picked up off the floor so I spent sometime practicing my hand writing and created guide lines for stamps and the. return address stickers.
These invites have been a real team effort, BH has guided the overall look and had some really good ideas during the design phase. He was responsible for the gluing of the pockets and all stamping, while I took charge of the cutting and assembly.
I have to say I'm really pleased with the finished result and from the feedback we've received our friends and family like them too. Now they are finished I know they were worth the time and effort, but the whole process did begin to get to me after hours of hand cutting the elements.
I have now started work on the Menu, place names and Order of Service to complete the set, but this time I am asking friends to help with the cutting.
Do let me know what you think of these.
TTFN ~Kate xxx
I have already shared with you how we came to some of our decisions, Beautiful Detail looked at the fonts and colours I have used and On My Marks explained the use of a pocket-fold invite and belly-band, but now I bring to you the full details (and dilemmas).
 |
| The outside with belly-band |
Using a Pocket fold enabled us to combine both tastes as well as creating a handmade item.
 |
| The inside: all elements in their place |
 |
| All the elements of the Invites You can see the stamp of the church which is hidden behind all the info sheets. |
I also decided to create a 'belly-band' to hold the invite together, but also to add a decorative, crafty element to the design. The demo band was just hessian, BH felt this was too shabby for it to work with the more formal style; I then found the grey stitch grosgrain ribbon, and after a second demo, we both felt that the design was greatly improved by its inclusion.
 |
| Invites to the church and reception |
 |
| Directions: front and reverse. Driving, Public transport and vintage bus info Map designed on Powerpoint |
 |
| Further Information: front and back. Local hotels, when photos being taken, Confetti (natural petals only), reminder the dress warm, a note about gifts and full contact info for my Mum. |
I originally ordered the circular RSVP seal stickers from Label Amour (their ebay store), who then kindly designed and printed the coordinating address labels.
 |
| RSVP card and sticker seal The card fold on itself has my parents address on the reverse |
 |
| Addressed Envelope with sender address label It took my months to practice my handwriting |
Having invested in lovely envelopes I decided that I wanted the invites to look good from the minute they are picked up off the floor so I spent sometime practicing my hand writing and created guide lines for stamps and the. return address stickers.
These invites have been a real team effort, BH has guided the overall look and had some really good ideas during the design phase. He was responsible for the gluing of the pockets and all stamping, while I took charge of the cutting and assembly.
 |
| Pockets and elements ready to start assembly. |
I have now started work on the Menu, place names and Order of Service to complete the set, but this time I am asking friends to help with the cutting.
Do let me know what you think of these.
TTFN ~Kate xxx
Pages of Style #8: Bring Bunting to life (tutorial)
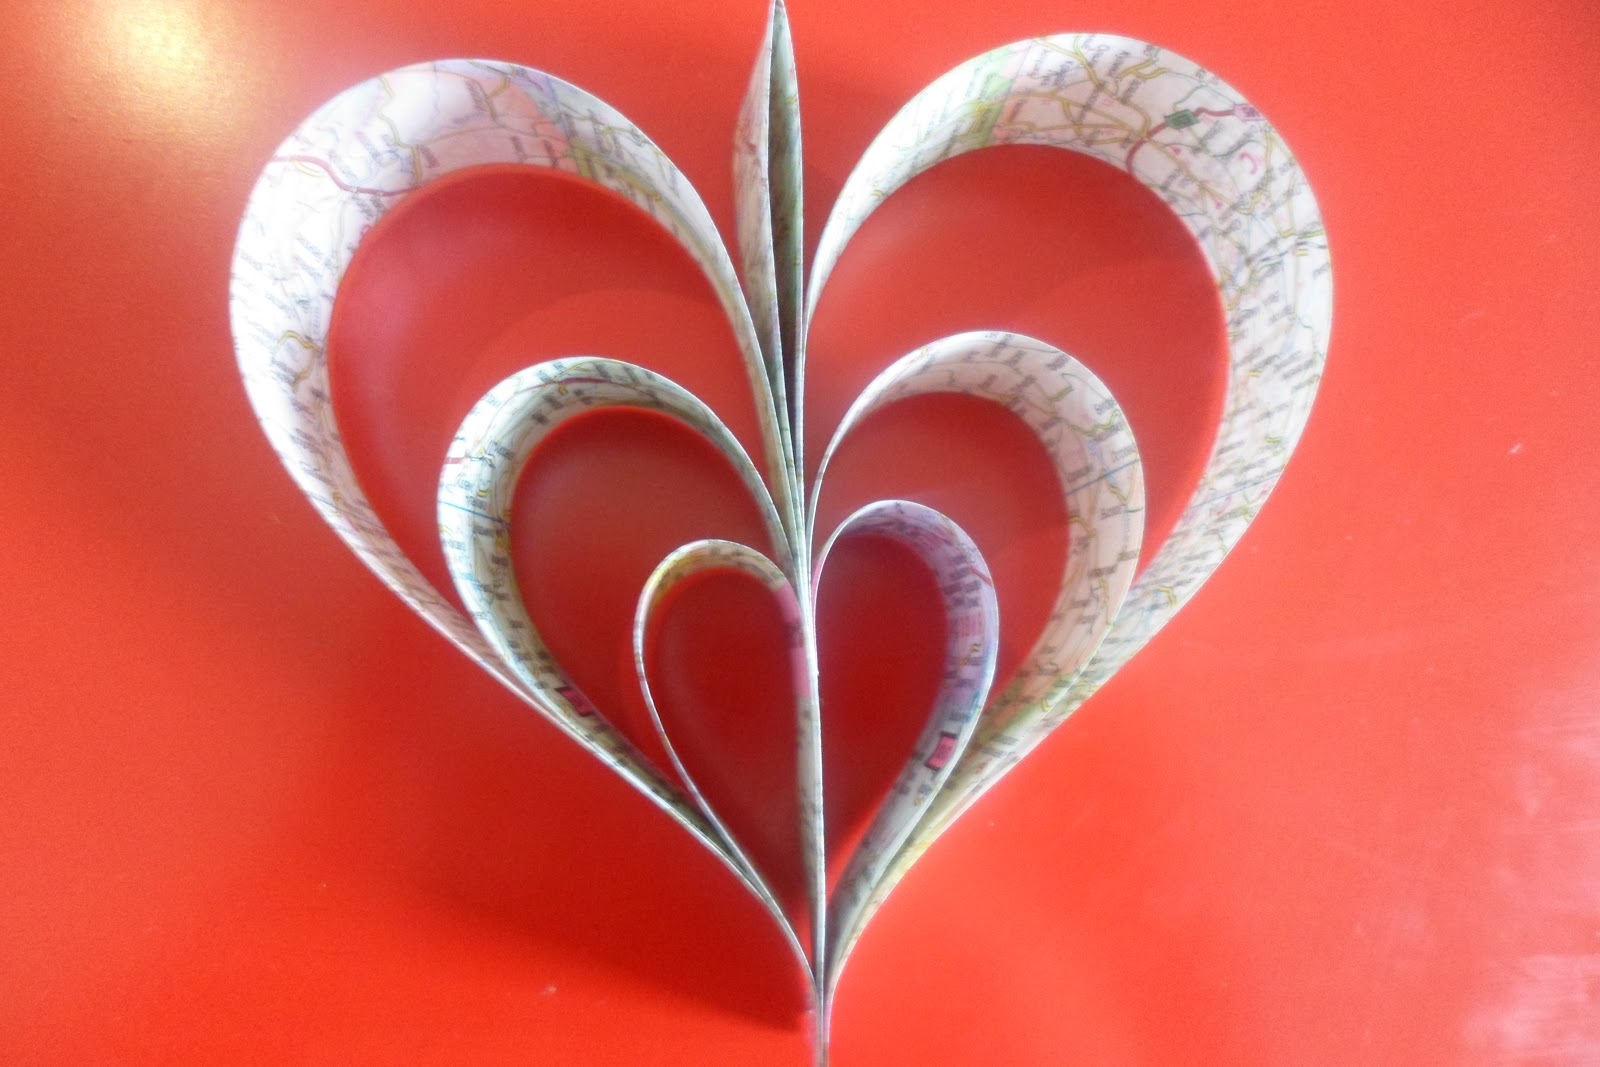

Paper, A4 page or 2 pages of a standard book
Scissors
Ruler
Staple
Craft hole punch
Pencil (and rubber)

To begin with you need to draw the guide lines for the sections you will need to cut.
For and A4 page, the easiest way is to use a standard 30cm rule place it flush with thelong edge of the page and draw a line, you will need to do this until you have 5 full sections (I found I used the whole page).
 With smaller pieces of paper you can either divide the width in 5 or fold and cut it into quarters and use more than one page per heart.
On two of the section you will need to draw a line a little over 1/3 of the down the page (on A4 I measure 11cm)

Cut along all these lines.
Fold one long section in half and you should end up with 2x 3 different length sections and a spine
 |
| The sections you should end up with: 2 short, 2 medium, 2 long ribbons and 1 long ribbon folded in half to make the spine |
 For each half of the heart you need to line the ribbons up, with a flush edge and in descending order.
About 4-5cm (based on an A4 design) from the folded edge of the spine, hold the two sets of ribbons so they sit parallel, with the longest ribbons against the center.

Beginning with the short ribbons bend each section to meet the bottom, (open) end of the spine. Hold each layer in place as you repeat until all 6 sections are once again flush.
Staple in place

You should end up with a shape like this (left)
Punch a hole in the spine and threat through your ribbon/string.
Experiment with how you want your heart to hang, you may need to give each shape a loop of string before connecting to the full length.
 |
| Hearts made from a copy of Romeo & Juliet Christmas 2011 |
 |
| 30+ Map hearts ready to be posted |
Once you get going these hearts and easy to make and take only a few minutes. You can use them for children's bedrooms or as an alternating for paper chains at children's parties or Christmas.
I hope you enjoy making them as much as I do.
TTFN ~ Kate xx
Accessories: Preparing for the Season
Getting married in January I need to be practical – it’s going to be cold and probably wet!
Following on from yesterdays post, I want to share with you my provisional thoughts on the other accessories I have had to consider to weather proof my outfit.
Following on from yesterdays post, I want to share with you my provisional thoughts on the other accessories I have had to consider to weather proof my outfit.
Wellies
Ok, lets be realistic, I’m having a indoor
wedding, and even when I am outside it will be on concrete/paths, I don’t NEED
a pair of wellies. But then I think about my heels, with very little grip and
my flats made of satin and the fact that a winter wedding is THE perfect time
to buy a pair of Hunter (http://www.hunter-boot.com/) or Joules boots.
My sister has already bought a pair of (childrens) Hunters to co-ordinate with the
colour scheme and I've got a cute pair of purple spotty wellies for my
Goddaughter/Bridesmaid, so I just have to decide which pair I want to buy.
 |
| Let it snow (or rain): Hunter RHS Original in Violet, Navy Golf Umbrella, Clear dome umbrellas, Weddington boots with bow photo from here, Edwardian Style Umbrella (Pagoda) photo from here and Hunter Original Gloss wellies in stone photo from Amazon |
If you follow me on Twitter you will be aware that the wellies have caused me some distress. About 3 weeks ago I discovered that the Joules Spring/Summer 12 range had wellies in the perfect shade of purple, I started hunting and eventually I found a pair at Topshop, advertised as purple but when they arrived they were Navy Blue. Finally, on Sunday I managed to win a pair on ebay and I got them a little cheaper than if I'd got them in the shops.
Umbrellas
Umbrellas
This is the one area where I could get carried
away… In an ideal world I want a white umbrella for me, a purple or taupe
umbrella for my sister, plain children’s size umbrellas in lilac and
black/taupe for my Bridesmaid and Pageboy and 4 black umbrellas for the ushers to use to
help escort people. In reality I am hunting Ebay for the best options.
Wrapping Up
I have thought long and hard
about this and a wonderful friend came to the rescue. A ‘normal’ coat would not
work with my dress and I cannot afford to spend hundred of pounds on one for
the day. While I like cloaks I think I am the wrong age to wear them, I look at
photos of women in their mid to late 20s and I think they often look daft and
it would suit me dress.
 |
| Staying stylish keeping warm (left to right): Shawl with rose detail, Lace overlay Imam by Pronovias, Coat with fur collar and sparkle belt, Fur lined hooded cape, knitted short shawl and full coat with fur collar and cuffs Madeline Issac-James 2012 photo found here |
I then started looking at knitted shawls, when I was younger
I would have a couple in my dressing-up box and loved them. So I contacted my
amazing friend Jill, who owns North Star Yarns (http://www.northstaryarns.com/), for
advice and she offered to make me one as my wedding gift – how cool is that?
Yet another fabulous handmade item for the wedding! I have since realised that
a shawl would be able to have a second life if we had children, I love the idea
that something made for our wedding won’t just sit safely in a box.
The wedding getting closer and now I have all the elements of my outfit sorted I'm getting really excited.
TTFN ~ Kate xxx
Tuesday, 23 October 2012
Pages of style #7: room decoration
 |
| Ornaments made from Comic books |
Over the past few years the decoration of weddings has changed; I remember the weddings I went to in my early twenties, decoration didn't seem to stretch beyond the flowers, some candles and perhaps some confetti on the tables, oh and I'm not forgetting a gorgeous cake. Now there's bunting, pompoms and feature walls, the options to making the space special and unique for your wedding are only limited by you imagination, time and budget.
There's something about dressing a venue that really appeals to me, however it would be too fussy and distract from the historic surrounding of our venue, St Mary's Guildhall Coventry. Instead I have gone a little crazy finding some fabulous ideas, using those trusty book pages, for those of you who do want some added personal details.
There are many options, from a riot of colour and shapes (why not stain your book pages) to having one shape repeated throughout your venue: choose a shape that is easy to create over and over again, and preferably symmetrical to allow for 3D designs.
 |
| Hearts: (Top row) *3 Hanging hearts by Maises Palce on Etsy, *Padded heart pouches, *Hole punched garland and *Heart garland (Bottom row) *Dolily heart tea light holder, *Looped Paper heart garland, *Blue Woven heart, and *3D heart strings |
To create a stunning backdrop to your ceremony, why not create circular fans in various sizes and tinted with different colours, attach these to a board or hang them to create your focal point. Another beautiful idea is to make origami cranes and thread them together - in the Japanese culture it is considered good luck for the couple to make these before their big day.
 |
| Bunting and garlands: (top row) *Paper chain, *Butterfly garland, and*Paper Crane Mobile originally from here but no longer available (bottom row) *Book page bunting (source unknow), *Circular Fan garland, and *3D circle/ball garland. |
 |
| Extra little details: *Lace edged table runner, *cake bunting, *vases (orignially found here but no longer available), *3D book houses *page covered tea light holders and*layered table runner |
 |
| One of my favorite decorations Book page pinwheels |
- Get a plan of you venue/space. know exactly how much space have and from that work out how best to fill it. Make sure if you want to hang things you know if and where you are able to attach your creations.
- Make sure you allow yourself enough time and rope in you family and bridesmaids/men
- Don't tell too many people your plans, that way if you only make 200 cranes instead of the 2000 people will be surprised and amazed by what you were able to create, rather than disappointed that they didn't get the full effect.
I hope you have enjoyed this brief tour of room decor that can be made from the pre-loved books.
TTFN ~Kate xxx
Accessories: hair, jewellery and shoes (oh my!)
In a post for Dotty Vintage Wedding I have discussed the
dress and I thought I would also do something here about my accessories.
Jewellery
My original idea had been to make all my jewellery. However,
once I started trying on dresses and really imagining what I would look like, I
realised that I already owned my wedding jewellery.
For my 21st Birthday I was given a pearl necklace
from my parents and the matching bracelet by my sister. They are simple stings
of beautiful creamy pearls. Since deciding that I would wear these I have been
told ‘not to worry about earrings’, which I take to mean someone has already
said they would like to get me something to match.
 |
| A beautiful and simple pearl jewellery set, similar to mine. by Highland Angel Weddings on Not On The High Street |
Hair
I have long curly hair, something that I thought I could
loose after it started falling out during a period of very ill health. So once
it started growing back in, I knew I wanted to wear my hair down and in some
sort of curls.
 |
| Stunning hair accessory ideas (clockwise from top left) Antique Gold Side Tiara, Feather Art Deco Birdcage veil, Crystal decorated Hair ribbon, Pearl headband with side flowers and pearl nature inspired headband |
After looking at the options on Bridal shops and browsing
many beautiful options online, I decided I wanted to make my hair pieces
myself. I purchased some pearls and Swarovski crystals, as well as the relevant
findings. After a couple of practices I soon found that both items I wanted to
make were easy.
The tiara/hair band I made, a single line of alternating
pearls (natural potato) and Swarovski crystals (clear and pale lilac), is
identical to what the local Bridal shop stocks (£50) and I made it for a
fraction of the price (approx £10) in less than an hour.
 |
| Paradise Jewellery UK have this elegant Swarovski pearl and crystal hairband/tiara |
I am also considering wearing a veil and my thoughts on this
can be found in my previous post Veiled in confusion.
Shoes
I love shoes, if I had more money I would have a wardrobe
full of them! So when it cam to choosing me shoes I got carried away. At first
I fell in love with a pair of Diane Hassell shoes from Elegant Steps
called Buttercup,
but the price tag was a big issue, and while they were still available I hadn’t
yet chosen my dress.
 |
| Buttercup |
Then a few weeks before I went dress shopping I was looking
at Irregular Choice shoes, and saw a pair that were stunning. After choosing
the dress and talking through the final look with my Mum and sister, I went
ahead and purchase the White and Gold Courtesan shoes which were limited
edition to Schuh.
I also managed to find a matching Irregular Choice bag on Amazon.
I have also got a pair of flat shoes, ready for dancing!
I have also got a pair of flat shoes, ready for dancing!
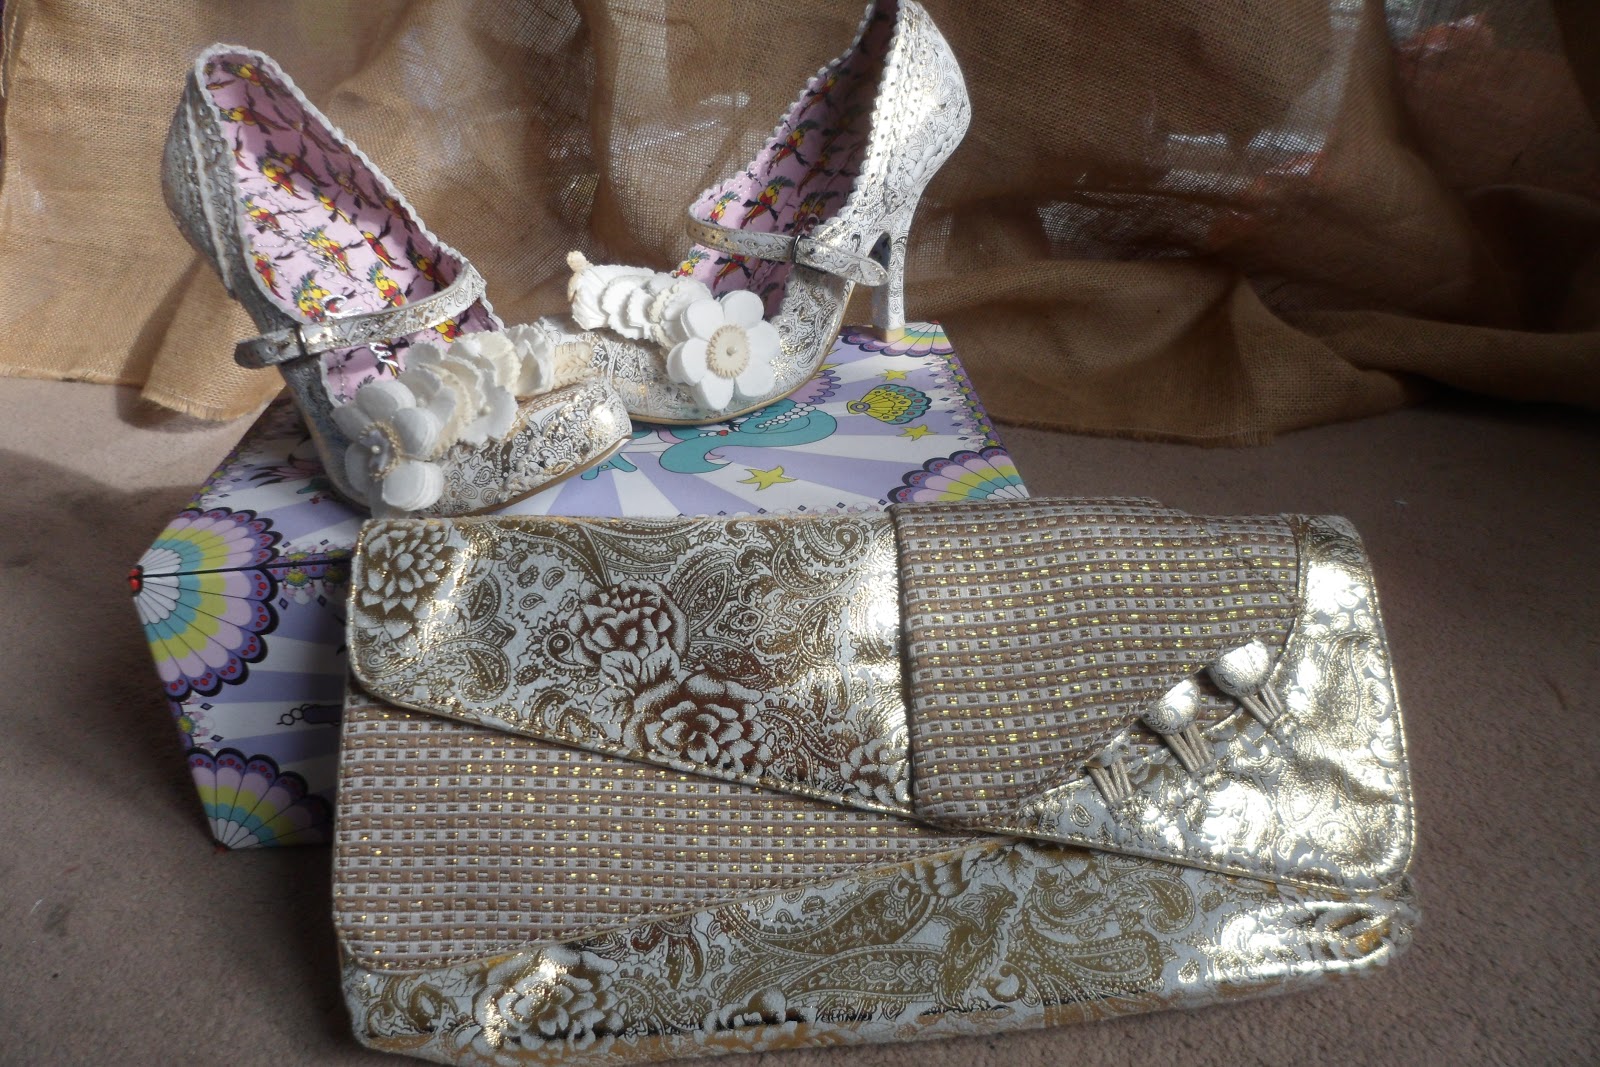 |
| My shoes and handbag |
Getting married in winter has led to lots of other accessory choices including wellies, brollies and how to keep warm. My thoughts on these can be found here.
TTFN ~ Kate xxx
Subscribe to:
Posts (Atom)